
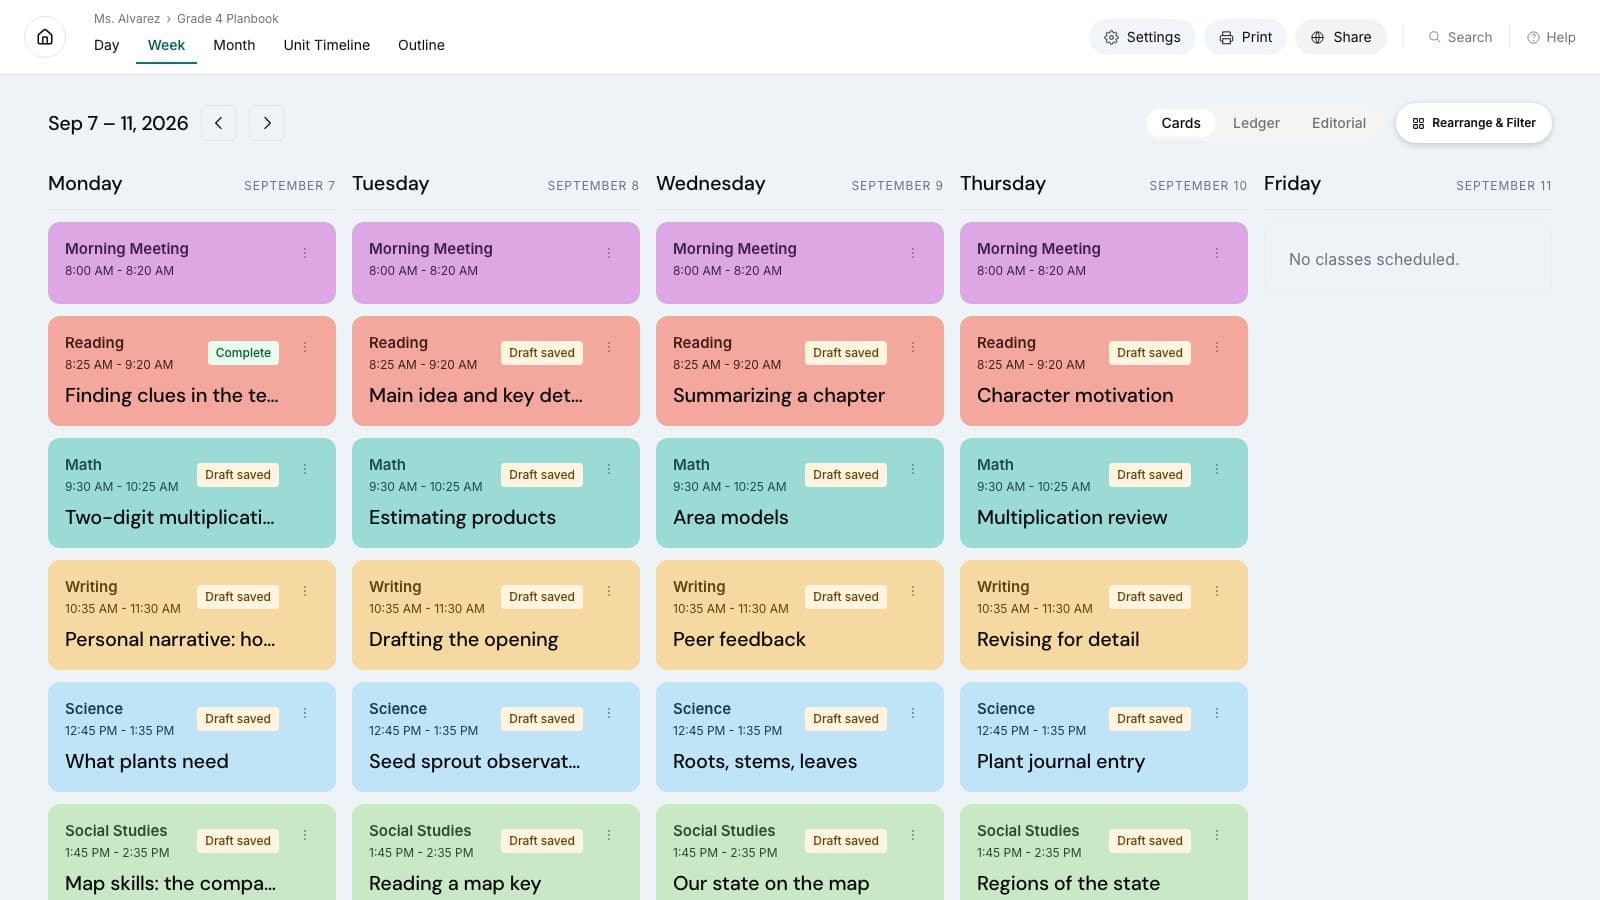
A teacher planner becomes useful when it turns many separate decisions into one repeatable workflow. Instead of beginning every Sunday with an empty week, you move from the dates that cannot change, to a flexible map of the year, to units, weekly sequences, and small daily lesson notes. After teaching, a short review updates the plan so the next week begins with reality rather than an old assumption.
This guide focuses on that workflow. If you first want to understand the role of the system and how it differs from a calendar, lesson plan, gradebook, or LMS, read What Is a Teacher Planner?. Then return here and build the process one layer at a time.
Begin with the dates that cannot move
Open the official school calendar before entering individual lessons. Add term boundaries, holidays, examination windows, reporting deadlines, professional learning days, assemblies, trips, and known shortened schedules. Include recurring timetable rules, such as alternating days or a class that does not meet every weekday.
The aim is not to decorate a calendar. It is to calculate teaching capacity. A five-week span on a wall calendar may contain fewer usable meetings for one class than another. A field trip can affect only one section. A testing window may keep classes in the building while changing room access or lesson length. Those details determine how much instruction can realistically fit.
Use a simple label system. Distinguish schoolwide closures from class-specific interruptions and personal reminders. When every event uses the same color and weight, the dates that affect instruction disappear inside general calendar noise. Keep the focus on constraints that change what can be taught.
Do not fill the whole year with detailed lessons at this stage. Far-future precision is usually false precision. Record enough to see available time and major destinations. The closer a week becomes, the more detail it can responsibly carry.
Map the year before filling individual lessons
Once constraints are visible, place the major curriculum blocks across the available weeks. Give each unit a working title, a broad outcome, and an approximate span. Add known assessments or performances when they genuinely determine the sequence. Leave some breathing room rather than allocating every available day.
This map helps answer two different questions. First, is the planned curriculum physically possible within the calendar? Second, where is flexibility most valuable? A complex unit scheduled across several interrupted weeks may need a different position. A short review unit may provide a useful buffer before reporting deadlines.
Treat the year map as a forecast, not a contract. Its purpose is to expose tradeoffs early. If the second term has fewer instructional days, a teacher can adjust the scope now instead of rushing through the final weeks. If two units depend on the same equipment or shared space, the sequence can reflect that constraint.
Connect each unit to the objectives or curriculum standards that matter. Do not paste an entire standards document into the plan. Select the standards the unit is designed to address and write the student-facing outcome in plain language. When a jurisdiction uses an external framework, link to its official source. For example, the Common Core State Standards are one framework used in some U.S. contexts; they are not a universal requirement for every teacher or location.
At the end of this step, the planner should show a plausible route through the year. It does not need to know the exact activity for a date several months away.
Turn units into a workable week
Weekly planning translates the unit map into a sequence that fits the actual timetable. Work across classes rather than completing one class in isolation. A side-by-side view makes preparation load, shared resources, and differences between sections easier to see.
Use this ordered workflow:
- Review the calendar. Confirm meetings, interruptions, room changes, and deadlines for the coming week.
- Check the current position. Record where each class actually stopped, not where the previous plan expected it to stop.
- Choose the week's outcome. Name the most important learning progress for each course or preparation.
- Sequence the lessons. Place instruction, practice, feedback, and assessment in an order that matches the available meetings.
- Check preparation demands. Identify printing, materials, links, equipment, or coordination that must happen before the lesson.
- Check the whole week. Look for overloaded days, conflicting resources, and classes that need different pacing.
- Leave room to adjust. Avoid using every minute and every day as though nothing will change.
For each lesson, begin with a short objective and the essential learning activity. Add detail only when it will help teaching. If three classes use the same core lesson, reuse the structure and record only meaningful differences. One section may need a retrieval activity before moving on; another may be ready for independent practice. The planner should reveal that difference without requiring three completely separate documents.
Weekly planning is also the right moment to decide what not to do. If a shortened Friday cannot support a full investigation, move the investigation and use Friday for analysis, reflection, or preparation. A realistic sequence is more valuable than a full-looking grid.
Keep daily lesson details small enough to maintain
A daily entry should help a teacher walk into the room and begin. A compact structure often includes:
- the learning objective or question;
- the opening or retrieval prompt;
- the essential activity and approximate flow;
- the check for understanding;
- direct links to slides, texts, or handouts;
- required materials or printing;
- a brief note about what follows.
Some lessons need more detail. A lab may require safety steps, quantities, group roles, and cleanup instructions. A substitute lesson may need explicit transitions and locations. A familiar discussion routine may need only the question, text, grouping choice, and final check. Use the amount of detail the situation requires rather than forcing every lesson into the same length.
Keep resource links beside the lesson that uses them. A drive folder can remain the long-term library, but the planner should remove the need to search during class. Use stable names that will still make sense next year. “Unit 3 lesson 2 source analysis” is easier to reuse than “Tuesday slides final v4.”
After teaching, make a small update. Mark the lesson complete, note where the class stopped, and record one consequence for the next meeting. This takes less time than reconstructing the class position several days later. The daily plan becomes a bridge between what was intended and what should happen next.
Connect standards to the lessons that address them
Standards tracking is useful when it supports planning, not when it becomes a separate data-entry exercise. Start at the unit level. Associate the small set of standards or curriculum outcomes the unit intentionally develops. Then connect individual lessons only when they introduce, practice, assess, or revisit part of that outcome.
Use meaningful relationships. A lesson containing a reading does not automatically address every reading standard. A standard is relevant when the task asks students to demonstrate the knowledge or skill it describes. This distinction keeps the record credible and makes gaps easier to notice.
Review standards coverage at natural checkpoints: while mapping the year, before finalizing a unit, and after an assessment reveals what needs more attention. Do not expect a coverage view to prove mastery. It shows where instruction was planned or delivered; student work and professional judgment provide the evidence of learning.
If your school requires a specific format, build export or printing into the workflow rather than maintaining a second set of plans. The planner can hold the working relationship among unit, lesson, and standard, while a printable view presents the required information for a meeting or review.
Plan for interruptions before they happen
Interruption is not an exception in a school year; it is part of the schedule. The useful question is not whether plans will change, but how the system behaves when they do.
First, distinguish a lesson from its date. The lesson contains an objective, activities, resources, and standards. The date is where the lesson is currently scheduled. When an assembly removes Tuesday's meeting, move the lesson rather than copying its contents into a new box. This preserves the work and makes the shifted sequence visible.
Second, identify the non-negotiable core of a lesson. If time is shortened, what must students encounter or demonstrate? Which practice can move to the next day? Which extension can be omitted without breaking the unit? Deciding this while planning is easier than improvising during a disruption.
Third, keep a few reusable structures available. A short retrieval routine, source analysis protocol, reflection prompt, or independent practice format can provide a purposeful lesson when a schedule changes suddenly. Reusable does not mean generic busywork. The structure stays familiar while the content remains connected to the current unit.
When parallel sections separate, do not force artificial synchronization. Record each class's real position, then look for a sensible point of convergence. One class may use an extra meeting for feedback or extension while the other catches up. The planner should support the difference until the sequence aligns again.
Use a short weekly review
A weekly review keeps the planner from becoming a museum of intentions. Reserve a small, consistent block of time—Friday afternoon, the final planning period, or another dependable point—to close the current week before opening the next one.
Use this reusable checklist:
- Mark what was actually taught in each class.
- Move unfinished lessons without duplicating their content.
- Record concepts that need reteaching or more practice.
- Note materials, links, or instructions that should be improved before reuse.
- Check whether parallel sections have separated.
- Update unit timing when a change affects later lessons.
- Review upcoming assemblies, deadlines, and shortened schedules.
- Identify printing, equipment, or coordination needed next week.
- Choose the most important outcome for each course next week.
- Remove notes that no longer support a decision.
The review should be short because the planner was updated in small ways during the week. If it requires reconstructing every class from memory, the daily capture step is too heavy, too vague, or happening in the wrong place. Adjust the routine until a brief note after class is enough.
Review also improves future reuse. A lesson marked “good” offers little guidance next year. A note such as “model the first example before pairs begin” or “print the source at a larger size” preserves a specific improvement. Keep the lesson's reusable structure and remove temporary details that will only create confusion later.
A teacher planner works when it stays current
The workflow can be summarized as a loop: record fixed dates, map the year, shape units, plan the week, keep daily notes compact, and review what actually happened. Each layer has a different level of detail, and each one informs the next.
Start small. Set up the current term and one active unit rather than importing every old file. Build next week using the seven-step workflow. After teaching, capture only the changes that affect the next decision. Run the Friday review. The system will become more useful as it accumulates current, connected information—not as it accumulates fields.
Paper, spreadsheets, and digital tools can all support this process. The best format is the one that makes updating easier than remembering. If rescheduling, multiple preparations, reusable structures, standards connections, and printing are recurring needs, you can explore the workflow in Teacher Planner. The pricing page describes the available plans, but begin by deciding whether the planning method itself fits the way your school week works.